
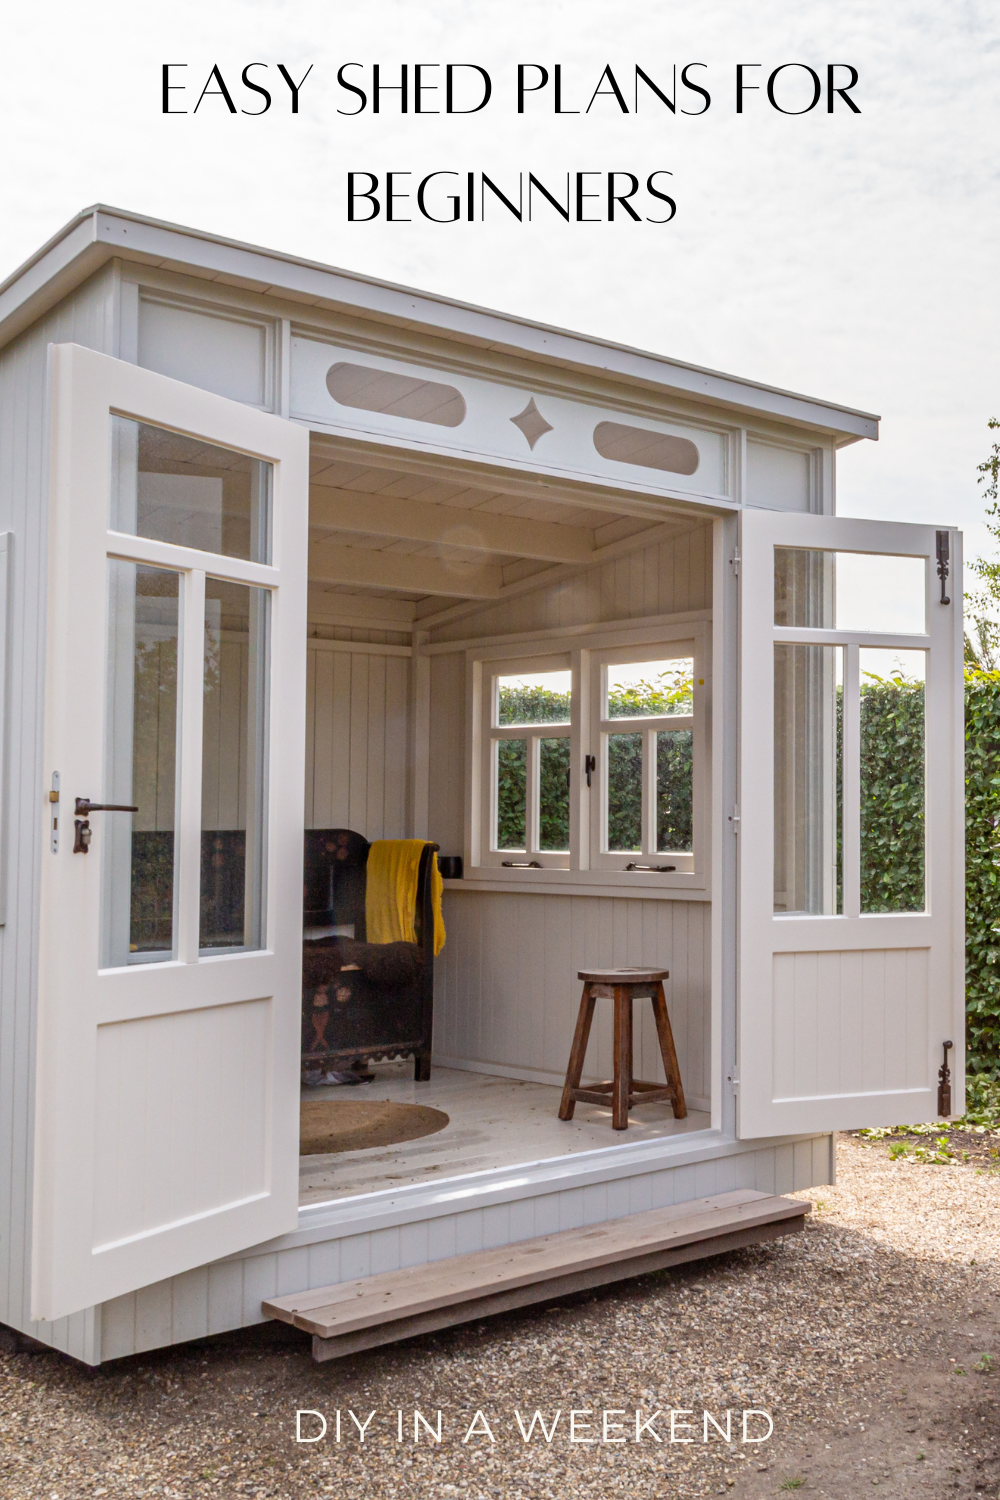
Easy DIY Shed Project for Beginners: Build a Backyard Shed Without Hiring a Contractor
If you’ve ever looked around your garage or backyard and thought, “We really need more space,” you’re not alone. Storage quickly becomes a problem for many homeowners, and hiring a contractor to build a shed can feel overwhelming — both logistically and financially.
The good news? A backyard shed is one of the most achievable DIY projects, even for beginners, when you start with the right plans.
This post is for anyone who wants an easy DIY shed project that doesn’t require advanced skills, expensive tools, or contractor prices.
Why a Shed Is a Great Beginner DIY Project
When people think of DIY projects, they often picture complicated renovations or tools they don’t own. In reality, a shed is a very practical and beginner-friendly place to start.
Here’s why:
✔️ It’s a standalone structure (no impact on your home’s interior)
✔️ Mistakes are easier to fix than inside renovations
✔️ You can work on it over weekends
✔️ It adds real function and value to your property
With clear instructions, building a shed becomes a step-by-step process instead of a guessing game.
The Key to an Easy DIY Shed: Start With a Plan
The biggest reason DIY shed projects fail isn’t lack of motivation — it’s lack of planning.
Without detailed shed plans, homeowners often:
Buy the wrong amount of materials
Guess measurements
Get stuck mid-project
Spend more money fixing mistakes
That’s why using pre-made, step-by-step shed plans makes such a difference, especially for beginners.
What Makes Ryan’s Shed Plans Beginner Friendly
If you’re looking for an easy DIY shed project, Ryan’s Shed Plans are designed with beginners in mind.
These plans remove the stress by providing:
Clear, step-by-step instructions written in simple language
Detailed diagrams and illustrations for each stage
Complete materials lists so you know exactly what to buy
Cut lists to save time and reduce waste
Multiple shed sizes and styles to fit different backyards
Instead of figuring things out as you go, the plans guide you from start to finish.
👉 You can see all of the shed plans included here
Tools You Typically Need (Nothing Fancy)
One of the best parts about this DIY project is that it doesn’t require specialty tools.
Most shed builds can be completed using:
A drill
A circular saw
A level
A measuring tape
A hammer
If you already enjoy small DIY projects around the house, you likely have most of what you need.
How Long Does a DIY Shed Take?
For many homeowners, this is a weekend DIY project spread out over a few days.
The timeline depends on:
Shed size
Number of helpers
Your available time
Because the plans are already laid out, you spend less time stopping to figure out next steps — which makes the entire process smoother and faster.
What Can You Use a DIY Shed For?
A backyard shed isn’t just for lawn equipment. These plans work well for:
Outdoor storage
Tool organization
Small workshops
Hobby spaces
Backyard offices
Seasonal item storage
Having a dedicated space helps keep your home, garage, and yard more organized.
Is This DIY Shed Project Worth It?
If you want more space without paying contractor prices, building a shed yourself is absolutely worth considering.
With the right plans:
You save money
You avoid common mistakes
You build with confidence
You end up with a functional space you’ll actually use
Instead of feeling overwhelmed, the process feels manageable — even if this is your first big DIY project.
👉 Click here to check out Ryan’s Shed Plans and see all available designs
Affiliate Disclosure
This post contains affiliate links. If you purchase through one of these links, I may earn a commission at no extra cost to you.
DIY Shed Plans That Actually Work: A Budget-Friendly Way to Build Your Own Backyard Shed
If your garage is overflowing, your backyard storage is lacking, or you’ve been dreaming of a workshop or backyard office, building a shed might be the perfect solution. The problem? Hiring a contractor can cost thousands — and winging a DIY project without clear plans often leads to frustration.
That’s exactly why DIY shed plans have become so popular with homeowners who want to save money and still get professional-looking results.
After researching countless options, one set of plans stands out for beginners and budget-conscious homeowners: Ryan’s Shed Plans.
Why Building a Shed Yourself Makes Sense
Before diving into the plans, let’s talk about why DIY sheds are such a smart option.
✔️ You Save Thousands
Custom-built sheds often come with high labor costs. When you build it yourself using step-by-step plans, you’re paying for materials — not expensive contractor fees.
✔️ You Control the Design
DIY shed plans allow you to choose the size, style, and purpose that fits your space — whether you need storage, a workshop, or a backyard office.
✔️ It’s More Beginner-Friendly Than You Think
With clear instructions, diagrams, and materials lists, shed building is very achievable — even if you’ve never tackled a project like this before.
The Biggest Mistake DIY Shed Builders Make
The most common mistake isn’t lack of tools or experience — it’s starting without a plan.
Without detailed shed plans, people often:
Buy too much (or too little) lumber
Guess measurements
Waste time correcting mistakes
Quit halfway through
That’s where Ryan’s Shed Plans make all the difference.
What Makes Ryan’s Shed Plans So Popular?
Ryan’s Shed Plans are designed to eliminate guesswork and give homeowners confidence from start to finish.
🔨 What’s Included:
Hundreds of shed designs in multiple sizes and styles
Step-by-step instructions written in plain language
Detailed diagrams and illustrations
Complete materials lists
Cut lists to save time and money
Plans suitable for storage sheds, workshops, and backyard offices
Everything is laid out so you know exactly what to buy and how to build it — no experience required.
👉 You can view the full collection of shed plans here:
Are These Shed Plans Good for Beginners?
Yes — and that’s one of the biggest reasons homeowners choose them.
If you can follow instructions and use basic tools, these plans are designed to walk you through each phase of the build. Many people use them for their first-ever DIY project.
You don’t need:
Advanced carpentry skills
Specialized tools
Construction experience
You just need the right plan and the willingness to get started.
How Much Does It Cost to Build a Shed Using These Plans?
Costs vary depending on size and materials, but most DIY builders report spending significantly less than hiring a contractor.
Instead of paying for labor, you’re investing in:
Lumber
Roofing
Basic hardware
The plans help reduce waste, prevent mistakes, and avoid unnecessary purchases — which saves money overall.
Who These Shed Plans Are Best For
Ryan’s Shed Plans are ideal if you:
Need extra storage for tools, seasonal items, or outdoor gear
Want a workshop or hobby space
Are considering a backyard office
Want a budget-friendly DIY project
Prefer clear, step-by-step instructions
If that sounds like you, these plans are worth checking out.
Final Thoughts: Is It Worth It?
Building a shed doesn’t have to be overwhelming or expensive. With the right plans, it can be a practical, rewarding project that adds real value to your home.
Instead of guessing your way through the process, Ryan’s Shed Plans give you a clear roadmap — from foundation to finish.
👉 Click here to explore Ryan’s Shed Plans and see all available designs
Affiliate Disclosure
This post contains affiliate links. If you make a purchase through one of these links, I may earn a commission at no extra cost to you.
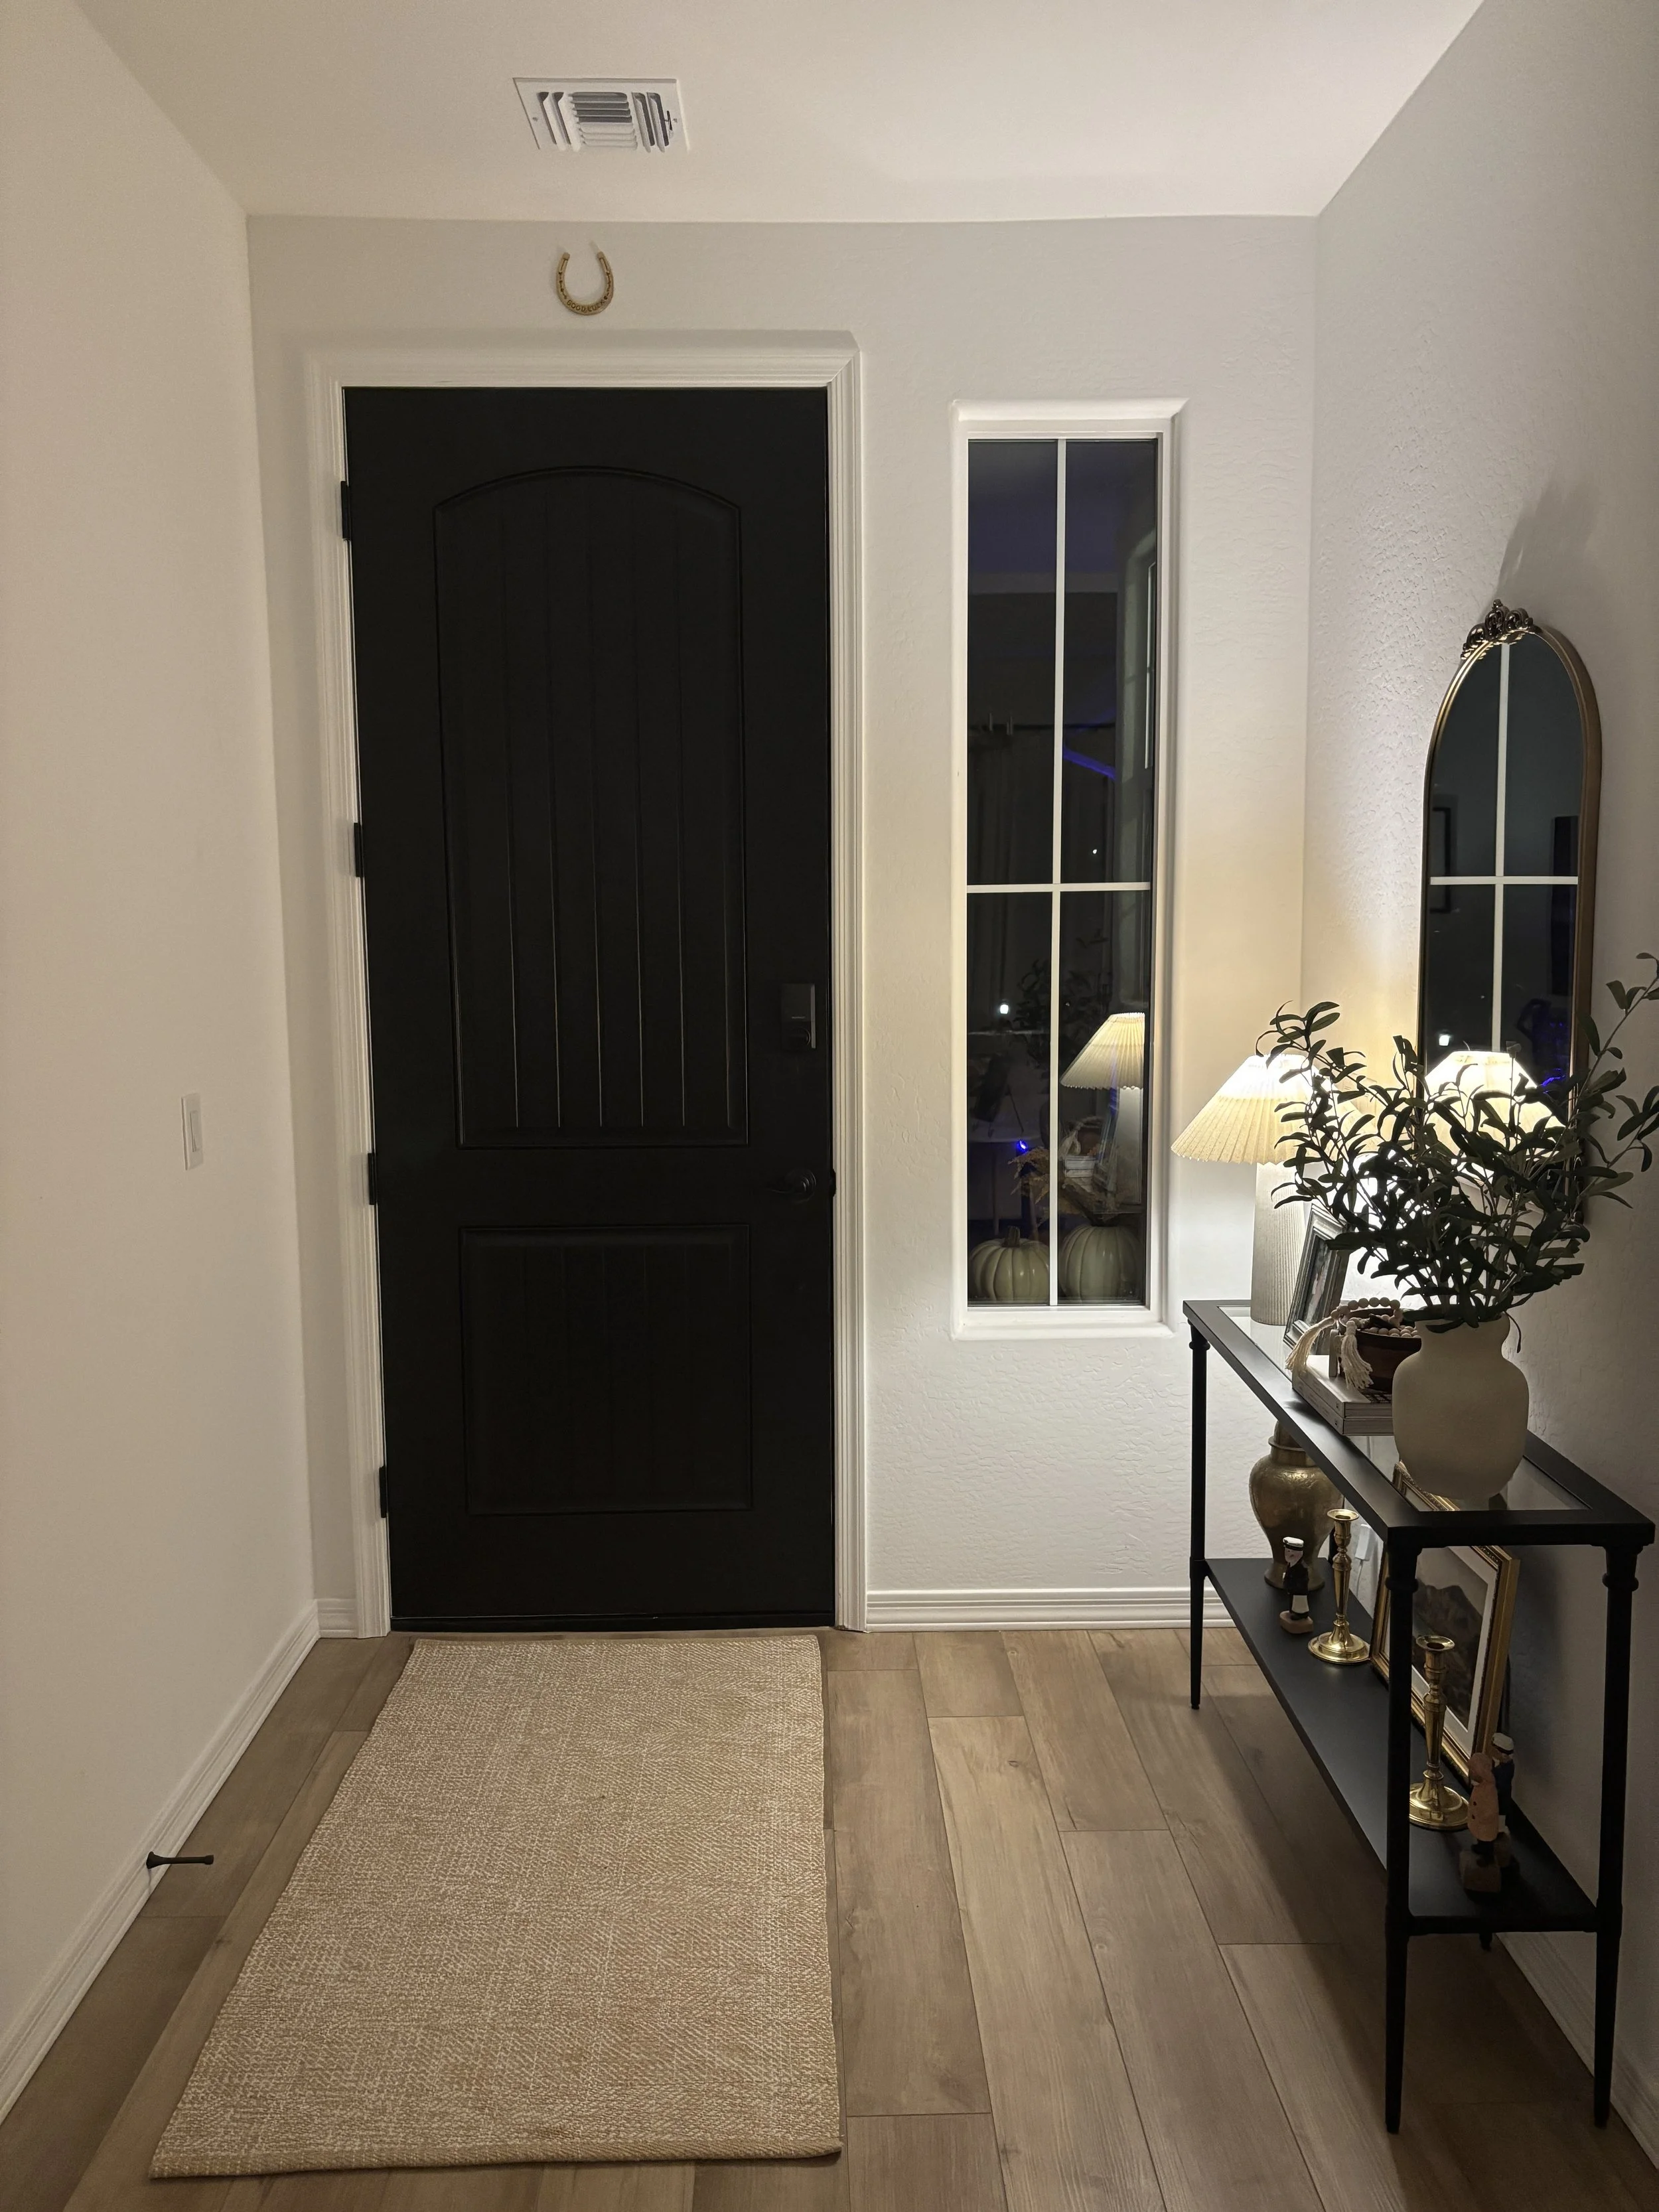
Quick DIY Front Door Makeover | From White to Limousine Black
Sometimes the easiest DIY projects make the biggest difference — and that’s exactly what happened with my front door refresh!
For the longest time, our front door was plain white. It blended right into the walls and had zero personality. I wanted something bold, modern, and stylish without spending a ton of money. Enter: paint! 🎨
I grabbed a can of Limousine Black paint and in just one weekend, my entryway was completely transformed. The black instantly gave the door a sleek, high-contrast look that makes it pop against our exterior. It’s one of those quick DIY projects that proves you don’t have to spend a fortune to create serious curb appeal.
Supplies You’ll Need
Limousine Black exterior paint (satin or semi-gloss finish works best)
High-quality paintbrush and/or foam roller
Painter’s tape
Drop cloth or old sheet
Sanding block (optional, if your door has texture or rough spots)
Mild soap and water (for cleaning before painting)
Step-by-Step: How I Painted My Front Door
Prep the Door
Wipe down your door with mild soap and water to remove any dirt, dust, or fingerprints.
Let it dry completely.
If your door is glossy or has bumps, lightly sand it so the paint sticks better.
Protect the Edges
Use painter’s tape around the edges, trim, and hardware (like your handle and lock) so you don’t get paint where you don’t want it.
Lay a drop cloth at the bottom of the door to catch any drips.
Start Painting
Stir your Limousine Black paint well before using.
Use a brush for detailed areas and a foam roller for the larger flat panels.
Apply thin, even coats to avoid streaks.
Let It Dry
Allow the first coat to dry completely (check your paint can for recommended dry times).
Apply a second coat for full coverage and that bold, polished look.
Remove Tape & Touch Up
Carefully remove painter’s tape before the paint fully cures to get clean lines.
Touch up any small areas with a brush if needed.
Why I Love This DIY
Fast & Easy: This project took just a few hours spread over a weekend.
Budget-Friendly: A single can of paint goes a long way.
High Impact: The transformation is dramatic, giving our entryway that “wow” factor.
If you’re looking for an easy weekend DIY project, I can’t recommend this one enough. Whether your door is plain white like mine was, or just needs a refresh, painting it a bold color is the simplest way to completely change the look of your home.
✨ For more budget-friendly DIY projects and affordable home finds, check out my other ideas here on KVLHomeFinds.com.
Must Have Laundry Room Essentials for an Organized Laundry Room
Transforming your laundry room into a functional and stylish space doesn’t have to be overwhelming. With a few budget-friendly essentials, you can create a space that is both organized and efficient. Whether you’re tackling a full weekend makeover or just looking for a few key upgrades, these Amazon finds will take your laundry room to the next level.
1. Lint Bin for Easy Cleanup
Say goodbye to messy lint traps! A wall-mounted or magnetic lint bin keeps your laundry area tidy while eliminating the need for plastic grocery bags or makeshift trash bins. Simply empty your dryer lint directly into the bin, keeping your space clutter-free.
If you’re always finding random single socks in your laundry, a lost socks basket is a must. Designate a small bin or basket for those loners until their match appears—no more tossing them in a random drawer!
3. Organizing Containers for Detergent & Dryer Sheets
Ditch bulky detergent bottles and store-bought packaging by transferring your laundry essentials into clear or labeled containers. Glass jars, acrylic bins, or stylish canisters make your detergent, pods, and dryer sheets look neat and aesthetically pleasing while keeping everything within easy reach.
If you haven’t tried Miss Mouth’s Stain Remover, it’s a game-changer for tackling tough stains on clothes, upholstery, and more. This powerful yet gentle formula works wonders on everything from coffee spills to grass stains—perfect for families with kids!
5. Storage Baskets for Cabinets
Maximize your cabinet space with woven or stackable storage baskets. Use them to neatly organize extra detergents, cleaning supplies, and miscellaneous laundry items, keeping everything accessible yet hidden for a clutter-free look.
6. Dryer Balls
If you’re looking to cut down on drying time, reduce static, and ditch chemical-laden dryer sheets, dryer balls are a must. These reusable wool or silicone balls help separate clothes in the dryer, allowing hot air to circulate more efficiently. Not only do they speed up drying time (saving you money on your energy bill), but they also soften fabrics naturally. Add a few drops of your favorite essential oil to make your laundry smell amazing—clean and fresh without the toxins!
With these simple Amazon finds, you can create an efficient, stylish, and organized laundry room in no time. Whether you’re working with a small space or a full mudroom setup, these essentials will help streamline your laundry routine while making the space feel more inviting! This blog contains associate links.

How to Makeover Your Laundry Room in a Weekend
Laundry Room Makeover
Transform Your Laundry Room into a Functional Mudroom in a Weekend
Creating a combined laundry and mudroom is a game-changer for organization and efficiency. With just a weekend, you can add cabinets for storage, a desk for mail organization, and a stylish mudroom area featuring board and batten, hooks, a shelf, and a bench. Plus, we’ll keep it budget-friendly with easy DIY solutions!
Materials Needed:
Stock cabinets are easy to install
Wood for a simple desk (or repurpose an old one)
MDF or pine boards for board and batten
Paint (pop of color)
Hooks for coats and bags
Amazon bench (to save time on DIY)
Screws, nails, level, and measuring tape
Power drill and saw
Step-by-Step Guide
Day 1: Installing Cabinets and Desk for Storage
Measure & Plan – Determine the layout for your storage area and desk space.
Install Cabinets – Secure stock cabinets to the wall, ensuring they are level. These will provide ample storage for laundry and household essentials.
Add a Desk – Attach a wood desktop between two cabinets or mount it with brackets for a floating effect.
Paint or Stain – If needed, paint the cabinets and desk for a cohesive look.
Day 2: Creating the Mudroom Area
Install Board and Batten – Measure and cut vertical battens, spacing them evenly. Attach them to the wall with nails or adhesive.
Paint Everything – Once installed, paint the board and batten the same color as the wall for a seamless, built-in look.
Add Hooks & Shelf – Secure hooks at a practical height for hanging coats and bags. Install a floating shelf above for extra storage.
Add the Amazon Bench – Instead of building a bench, purchase a ready-made bench from Amazon and place it under the hooks.
Finishing Touches – Add baskets, decorative elements, and functional storage solutions to complete the space.
Budget-Friendly Tips:
Use Stock Cabinets – These are much cheaper than custom-built options.
DIY Your Board and Batten – Instead of pre-made panels, buy inexpensive MDF boards and cut them yourself.
Buy an Affordable Bench – Purchasing a pre-made bench from Amazon saves time and effort while keeping costs low.
Buy Hooks in Bulk – Purchasing a multipack can save money.
With just a weekend’s work, you’ll have a beautiful, functional space that keeps your home organized and stylish. Would you tackle this DIY project? Share your thoughts below!